
A closer look at your flock
Learn the details.
Spot the difference.
Clear diagrams to learn from. Real photographs to compare. Small details that make a big difference at the coop.
6 topics · Labeled visuals · Trusted readingFIELD NOTE 01 / Chicken anatomy
Put a name to the part.
Start with seven landmarks. Select a number on the hen or in the key to highlight the matching feature.
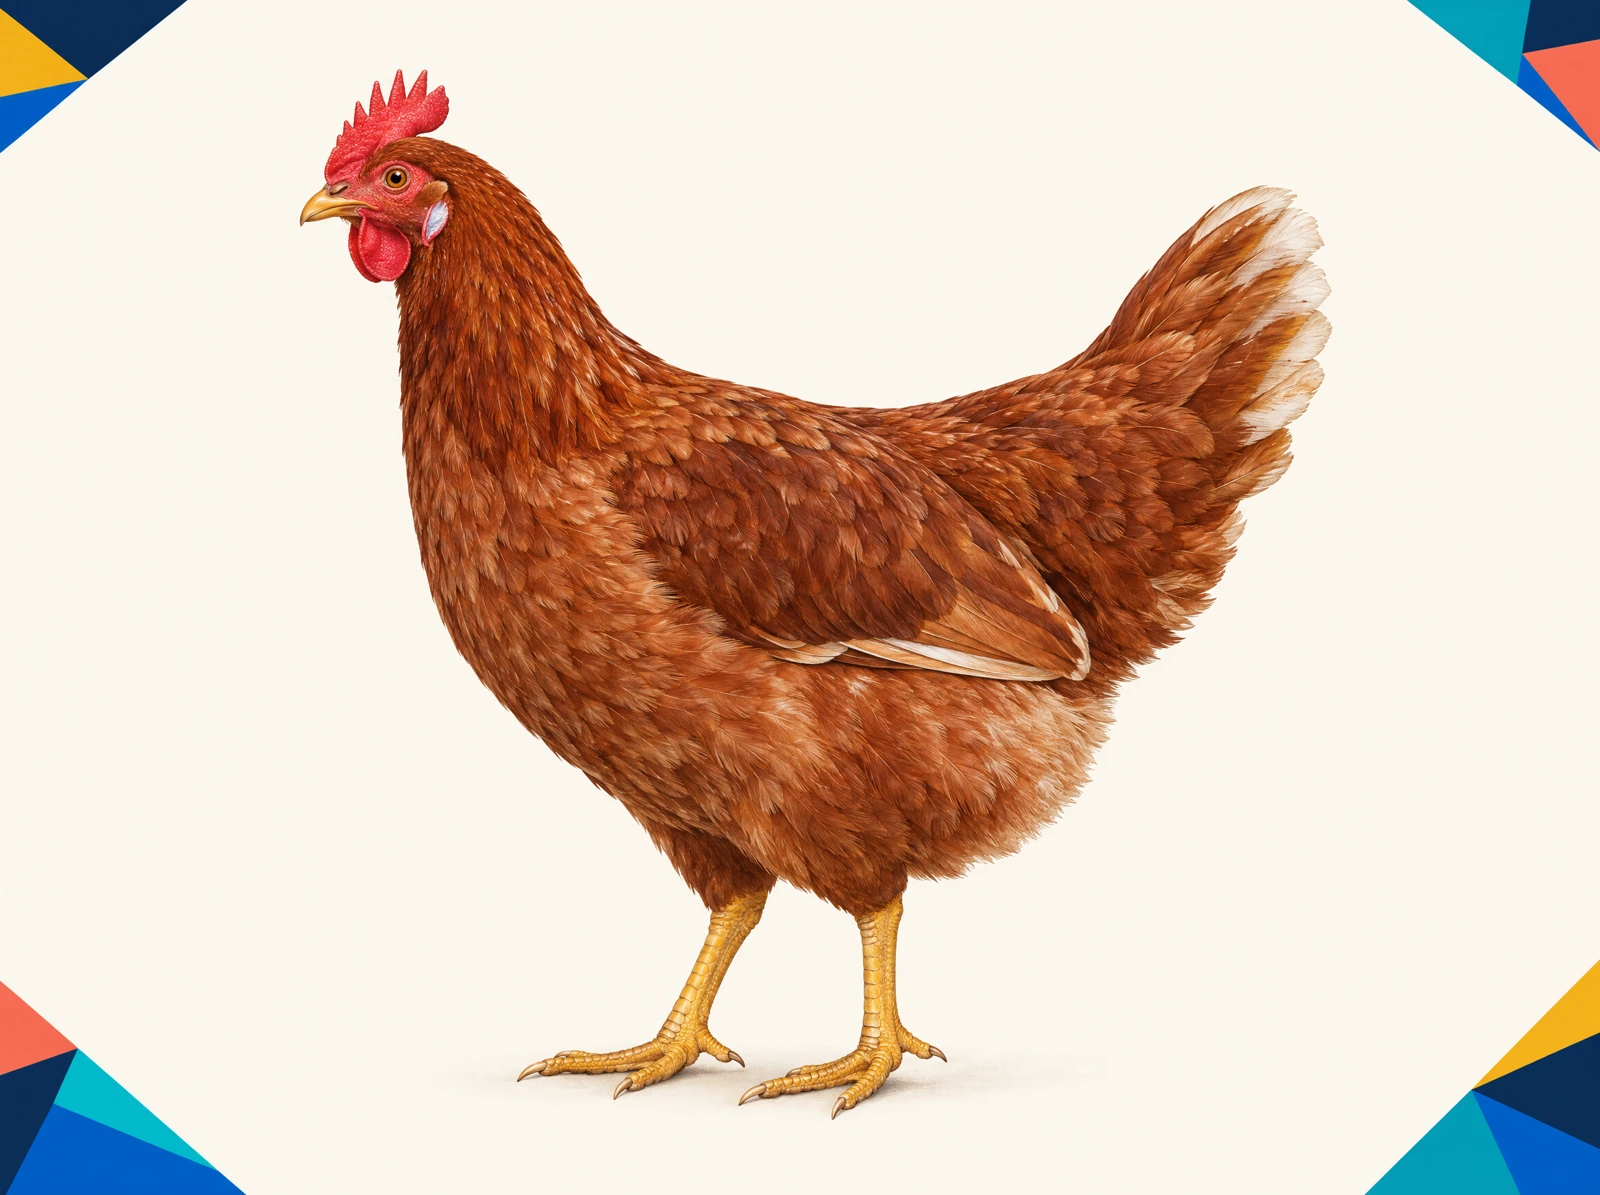
THE VISUAL KEY
Select a number to match the picture and key.
From diagram to real life
Same landmarks. Different feathers.
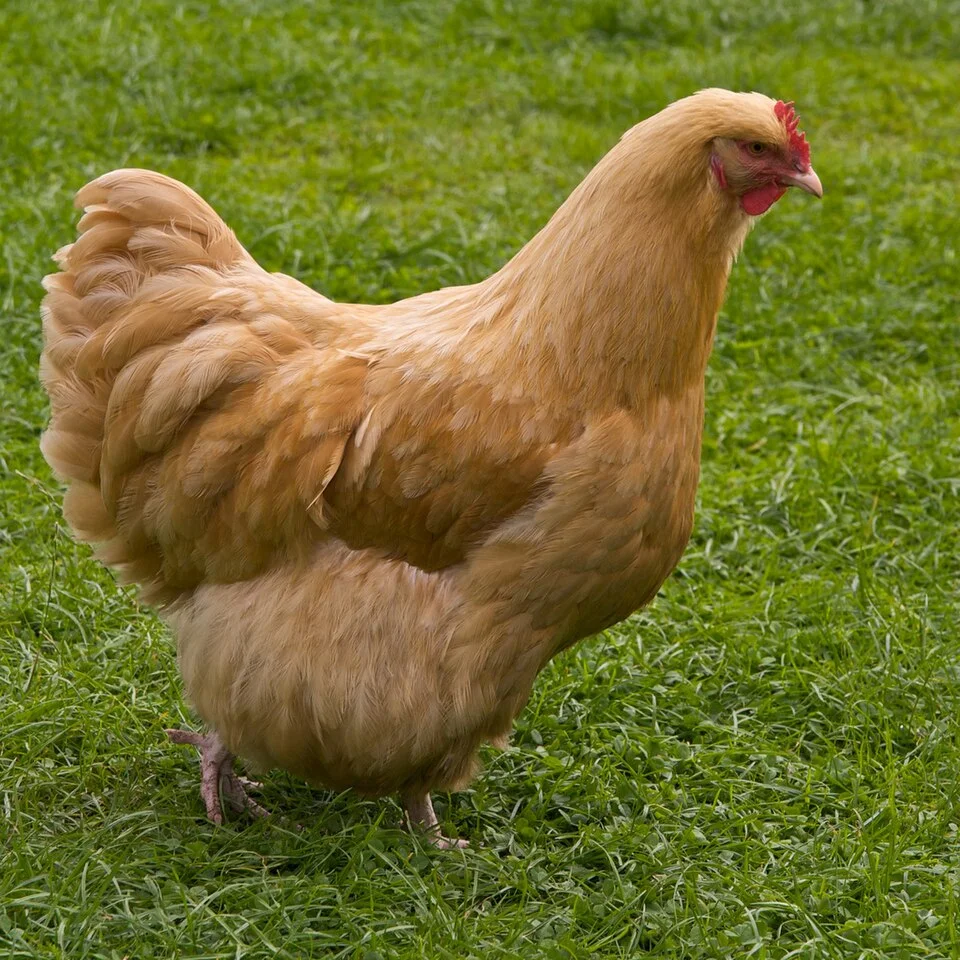
Find the head, wing and tail
1 · Comb. 2 · Wattles beneath the beak. 3 · Folded wing. 4 · Tail. This Buff Orpington faces the opposite way from the diagram.
Photo: Pete Cooper · CC BY 2.0 · resized.
Start with position,
then compare appearance.
A fluffy breed can hide landmarks that are obvious in a diagram. The position of the comb and wattles is more useful than matching the hen’s color.
For legs and toes, use a photograph where grass and feathers do not hide the feet.
Explore breed differences →FIELD NOTE 02 / Unusual eggs
What’s different about this egg?
Look at shape, surface and cracks separately. Compare the real photographs below, then open a photo for a closer look.
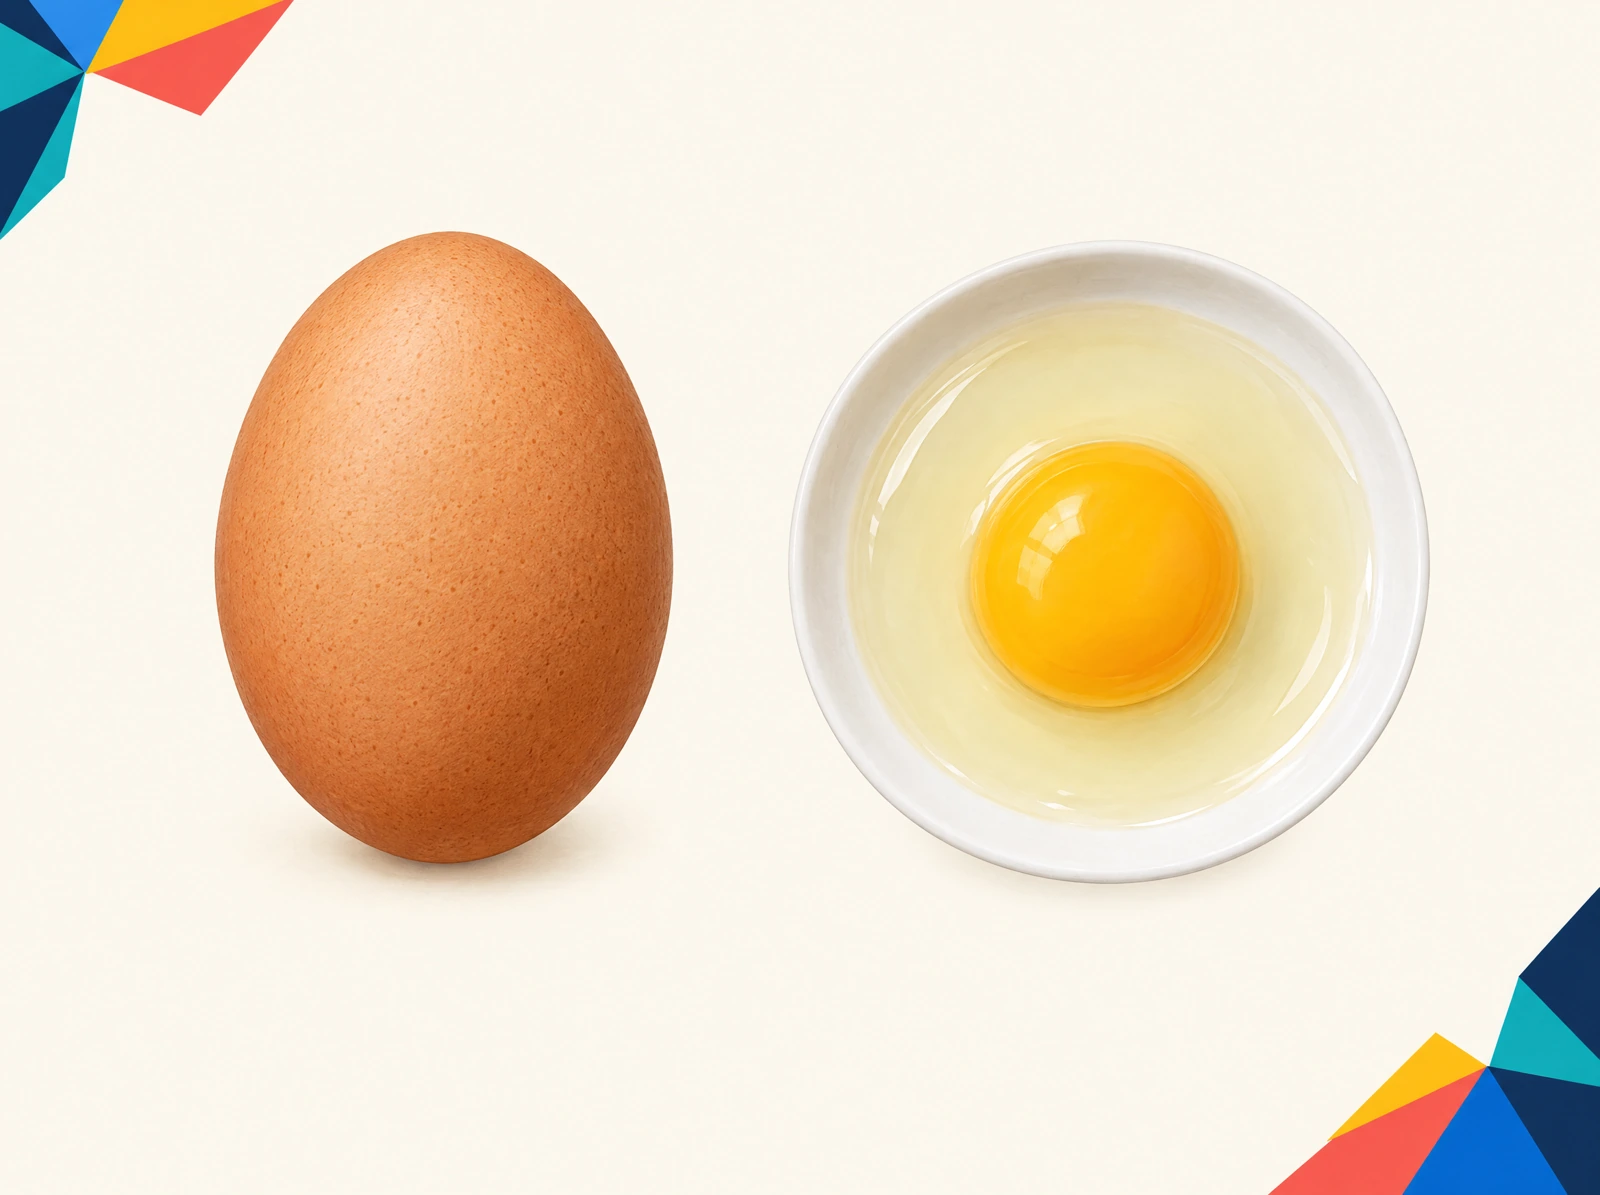
THE VISUAL KEY
Select a number to match the picture and key.
Real shell examples
Three different things to look for.
Compare shape and texture.
Use Enlarge for a closer look.
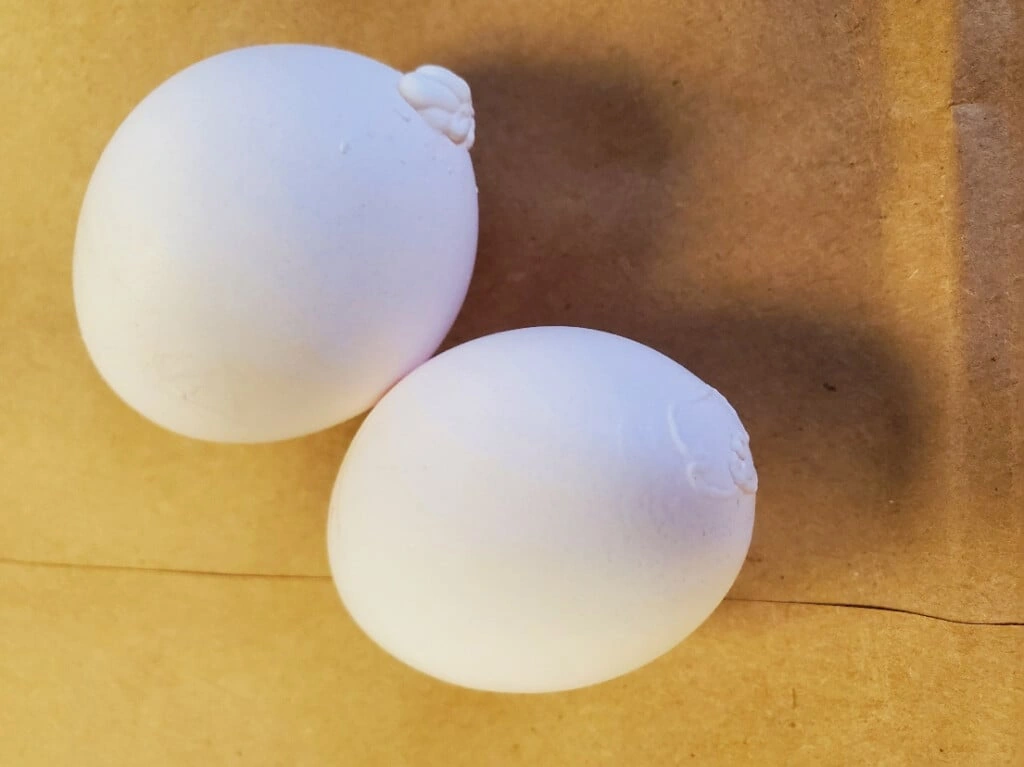
Raised calcium deposits
1 · Distinct lumps sit on top of the shell, instead of following its smooth curve.
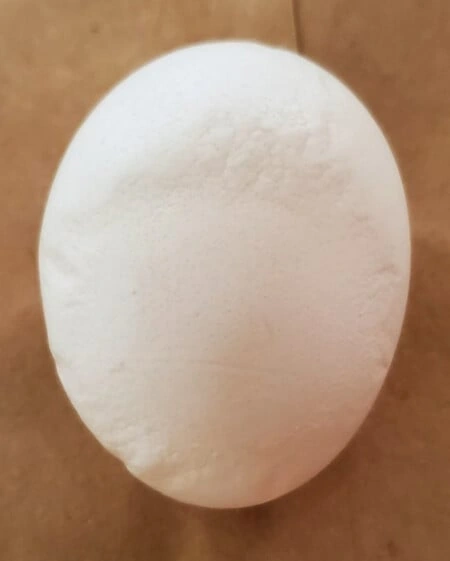
A flattened side
1 · Follow the left outline. This area is flatter than the usual rounded curve.
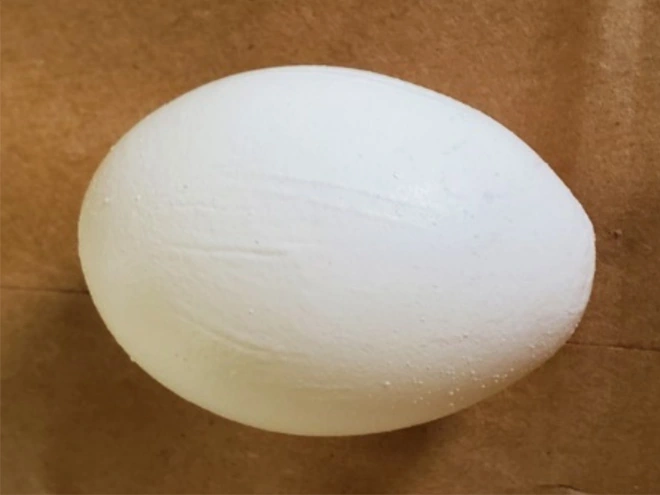
Wrinkles & ridges
1 · Folds and ridges run across the shell, rather than forming isolated dots.
Side-by-side comparison
Some cracks hide in plain sight.
The same example in room light
and illuminated by candling.
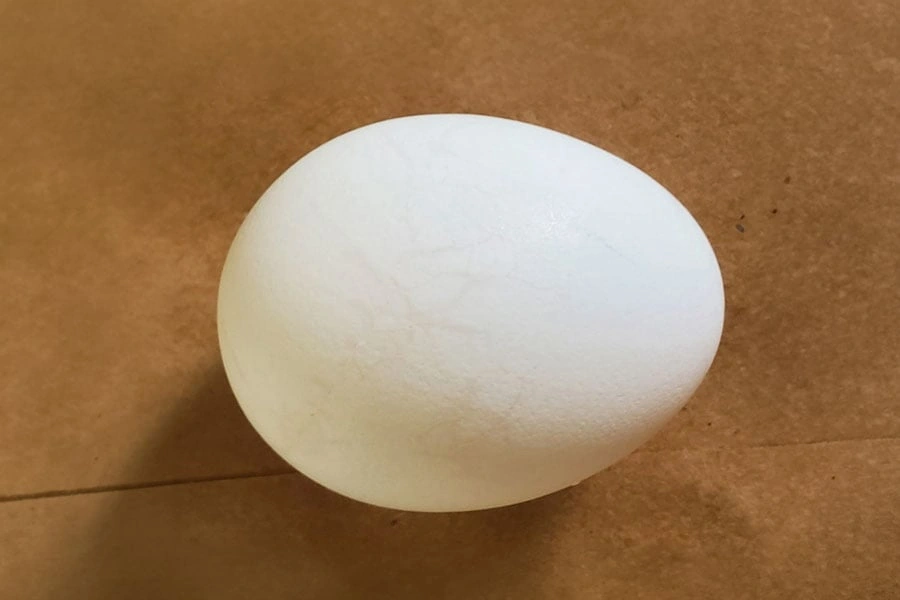
1 · Ordinary light
At first glance the shell looks almost smooth. Look closely for the faint fracture lines.
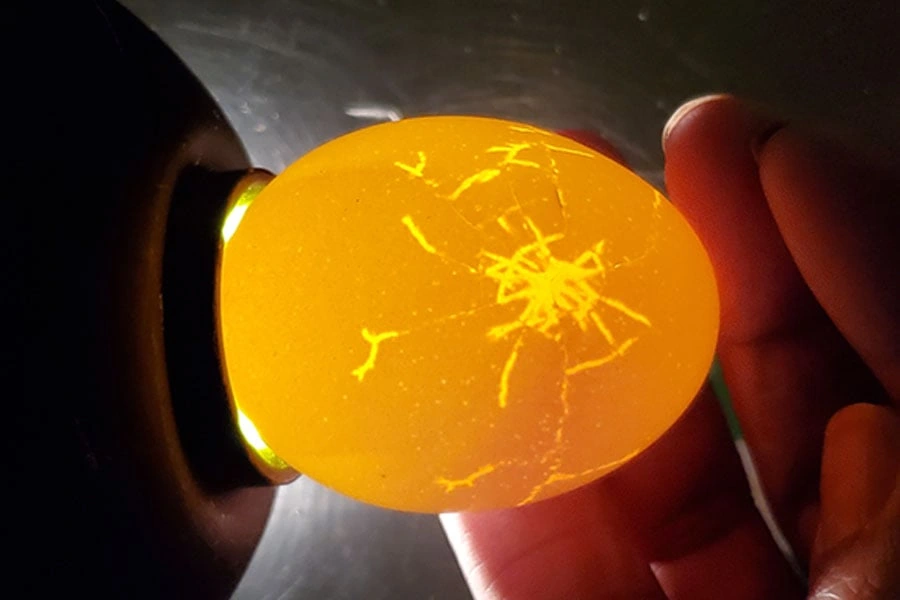
2 · Candled
Backlighting makes the branching cracks stand out. This comparison teaches visibility, not food safety.
Photos: C. S. Dunkley. From A Dozen Egg Abnormalities: How They Affect Egg Quality , Circular 1255, University of Georgia Cooperative Extension, 2022; reviewed July 27, 2026. Reproduced for educational use under UGA’s reuse policy . Converted to WebP; photographed features unchanged.
FIELD NOTE 03 / Molt & feathers
From pin to feather.
A pale sleeve and an opening feather tip tell different parts of the regrowth story. Follow the three illustrated stages, then compare them with a real hen.
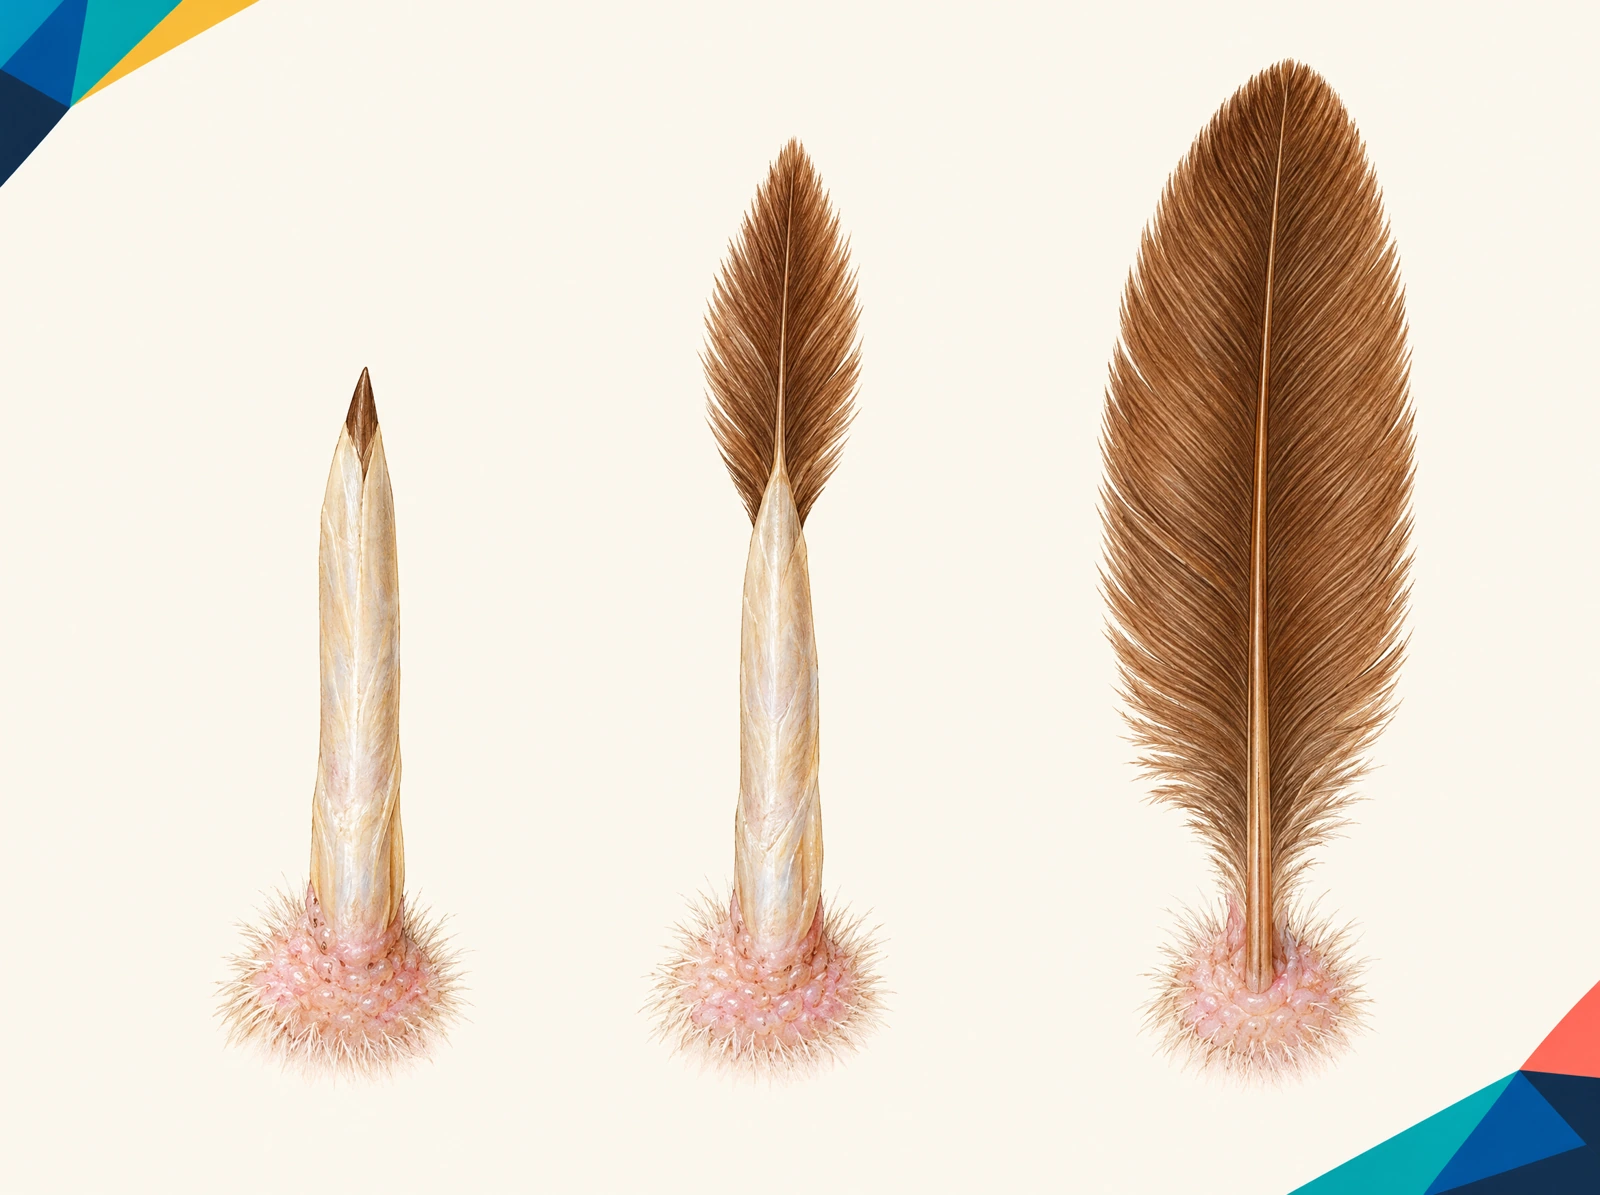
THE VISUAL KEY
Select a number to match the picture and key.
Spot the feature in a real photo
The pale “pins” are new feathers.
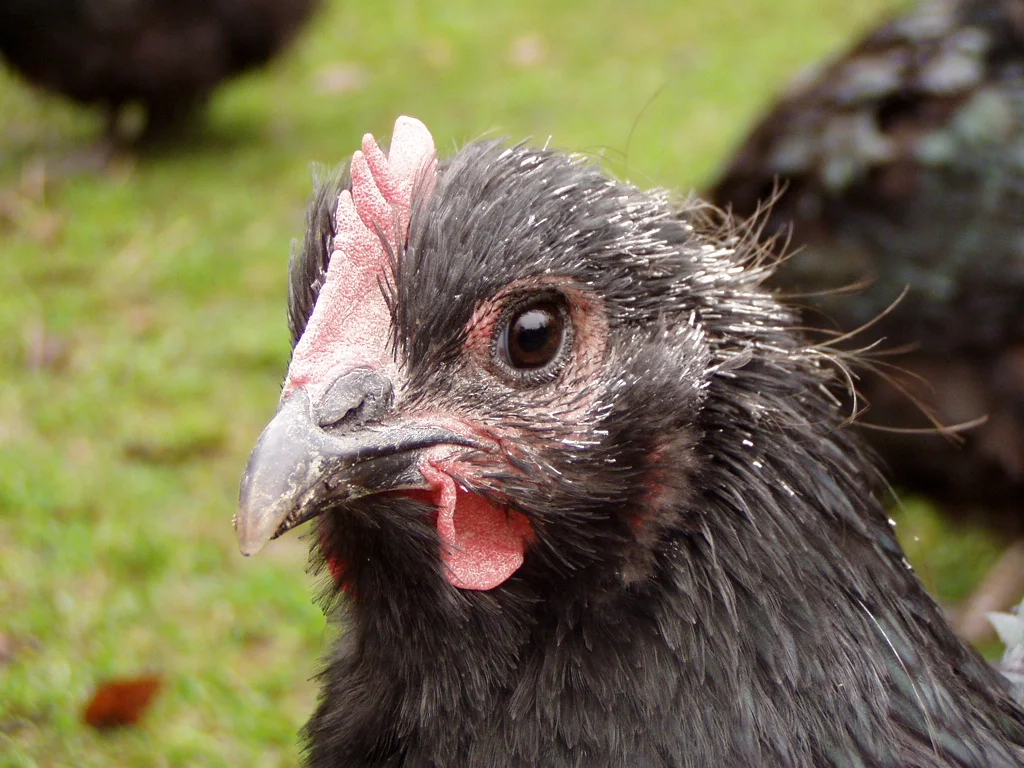
Pin feathers around a hen’s head
1 · Pale narrow sheaths around the head and neck. 2 · Open, overlapping neck feathers below them.
Photo: Rex at Dutch Wikipedia · CC BY-SA 3.0 · resized; reference labels added separately.
Compare the covering,
not just the missing feathers.
The pale sheaths help distinguish new growth from an already opened feather. A bare patch by itself does not tell you why feathers were lost.
Use the diagram to understand the sheath and the real photograph to find it among other feathers.
Read the pin-feather explanationFIELD NOTE 04 / Mites, lice & fleas
On the bird, or in the coop?
Location matters. Use the map to orient yourself, then compare five documented real-photo examples below.
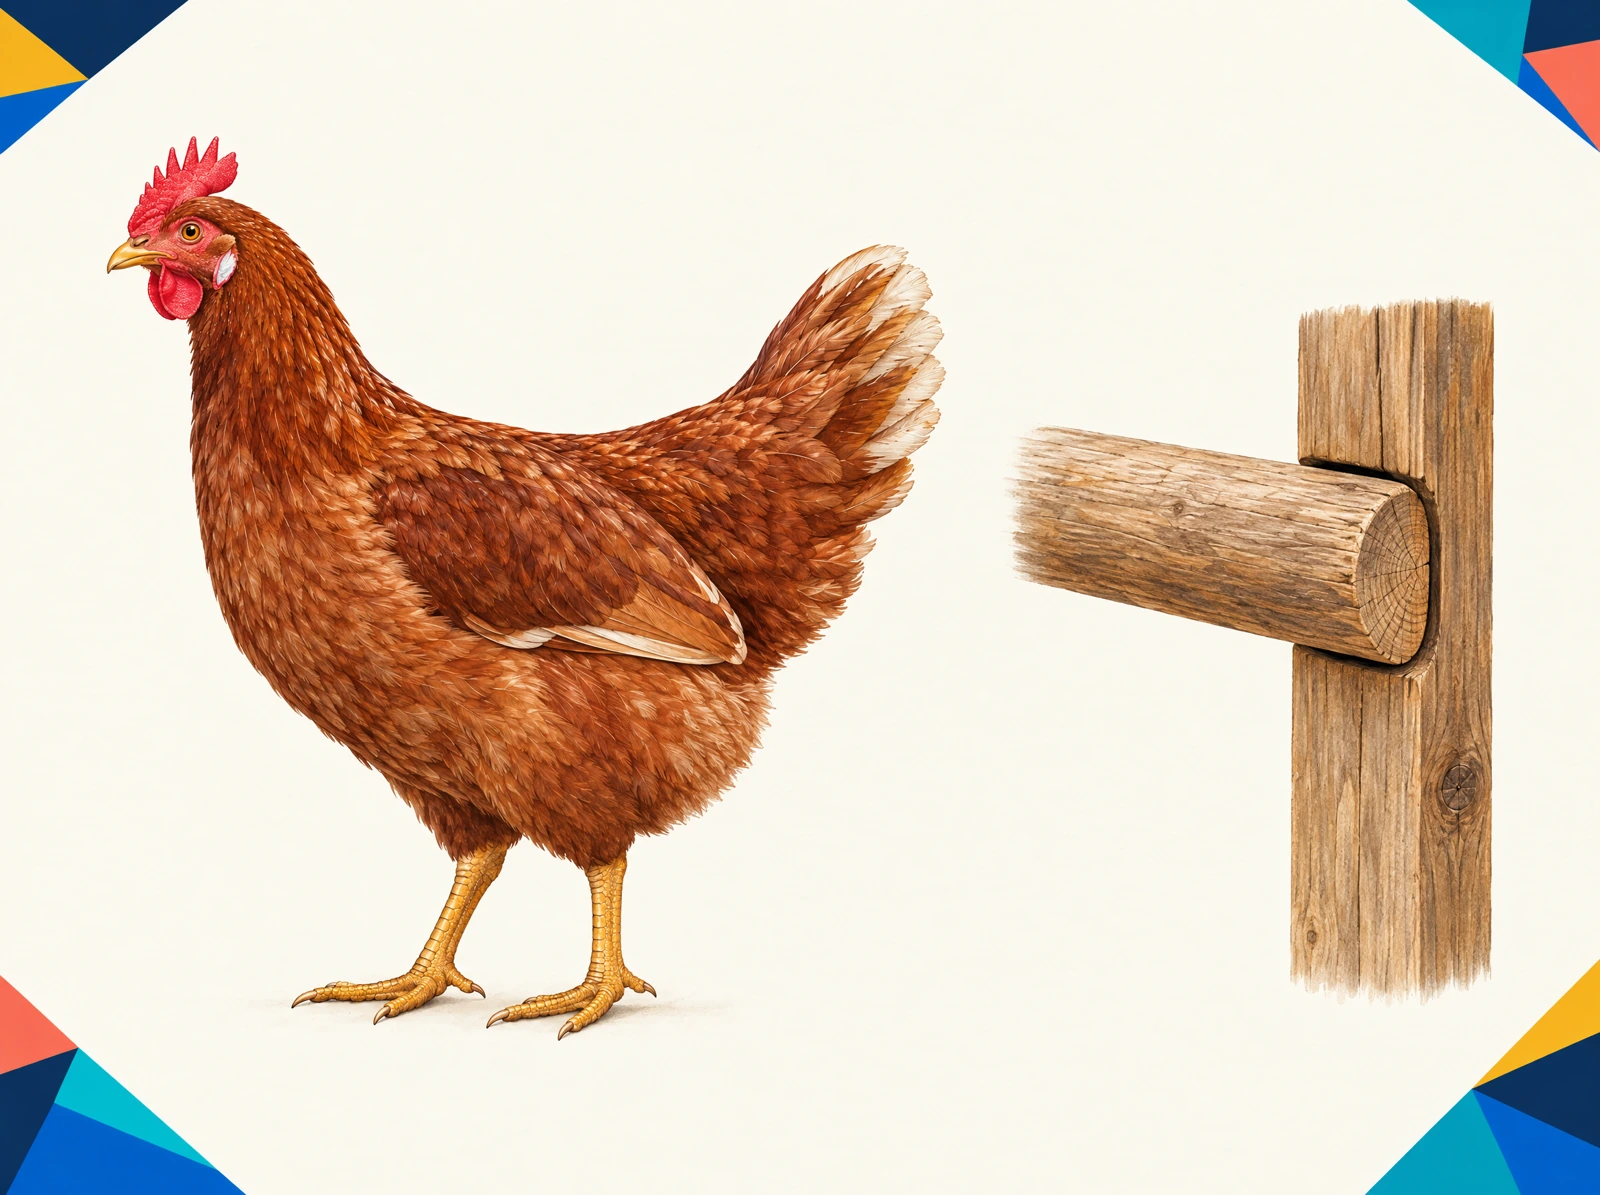
THE VISUAL KEY
Select a number to match the picture and key.
Documented identification photographs
Five examples. Two places to inspect.
Original source circles and arrows
mark the features worth examining.
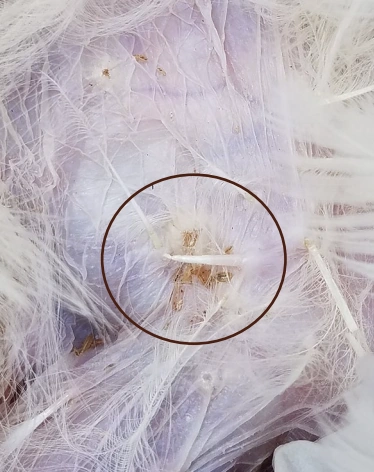
Body lice & attached eggs
Inside the original circle: pale lice and attached egg clusters among feather bases.
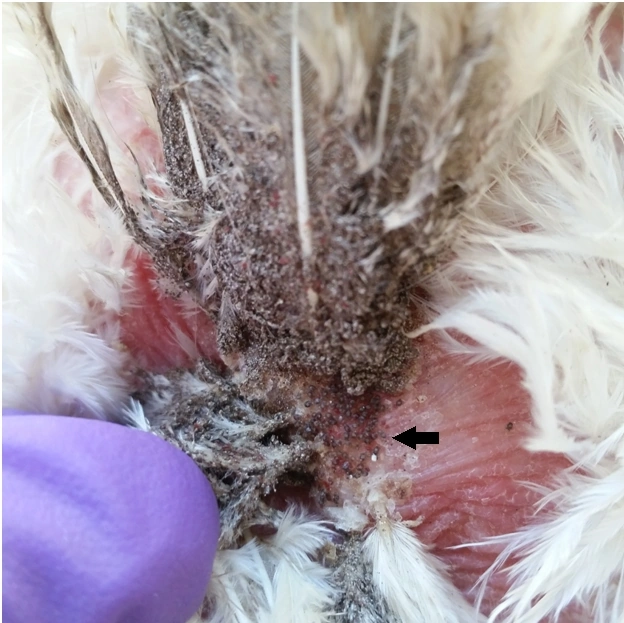
Northern fowl mites
The original arrow points to mites among feathers in the vent region.
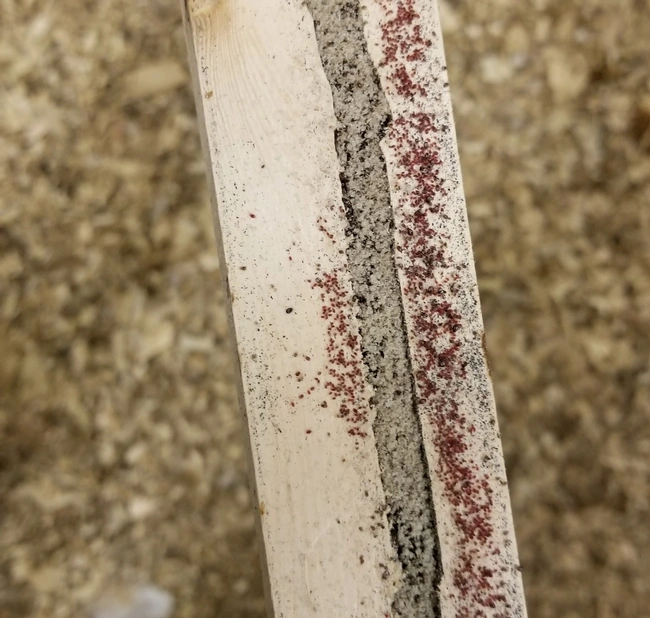
Poultry red mites
Look at the many tiny mites clustered along the roost’s surface and crevice.
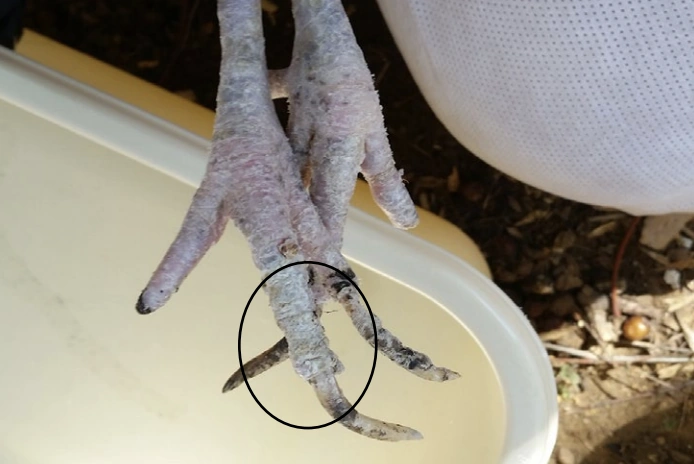
Scaly-leg mite changes
The circle shows crusty, raised leg scales. These are changes caused by mites, not visible mites.
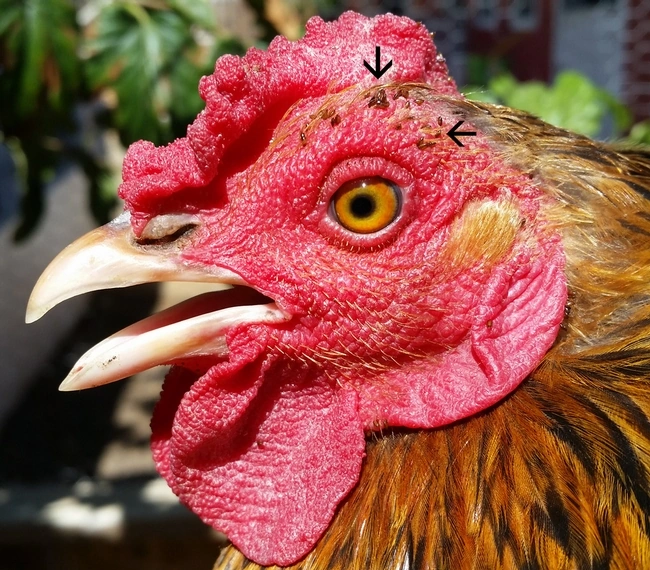
Sticktight fleas
The original arrows mark attached fleas around the comb and face.
Photos: Amy Murillo, UCR. Pests of Backyard Chickens , UC ANR, September 22, 2026. © Regents of the University of California. Used with permission. Original reference circles and arrows retained; no AI alteration.
FIELD NOTE 05 / Predator clues
Read the scene before naming a suspect.
Photograph the entry point, disturbed ground and clear prints. A feather pile or damaged latch alone cannot tell you which animal visited.
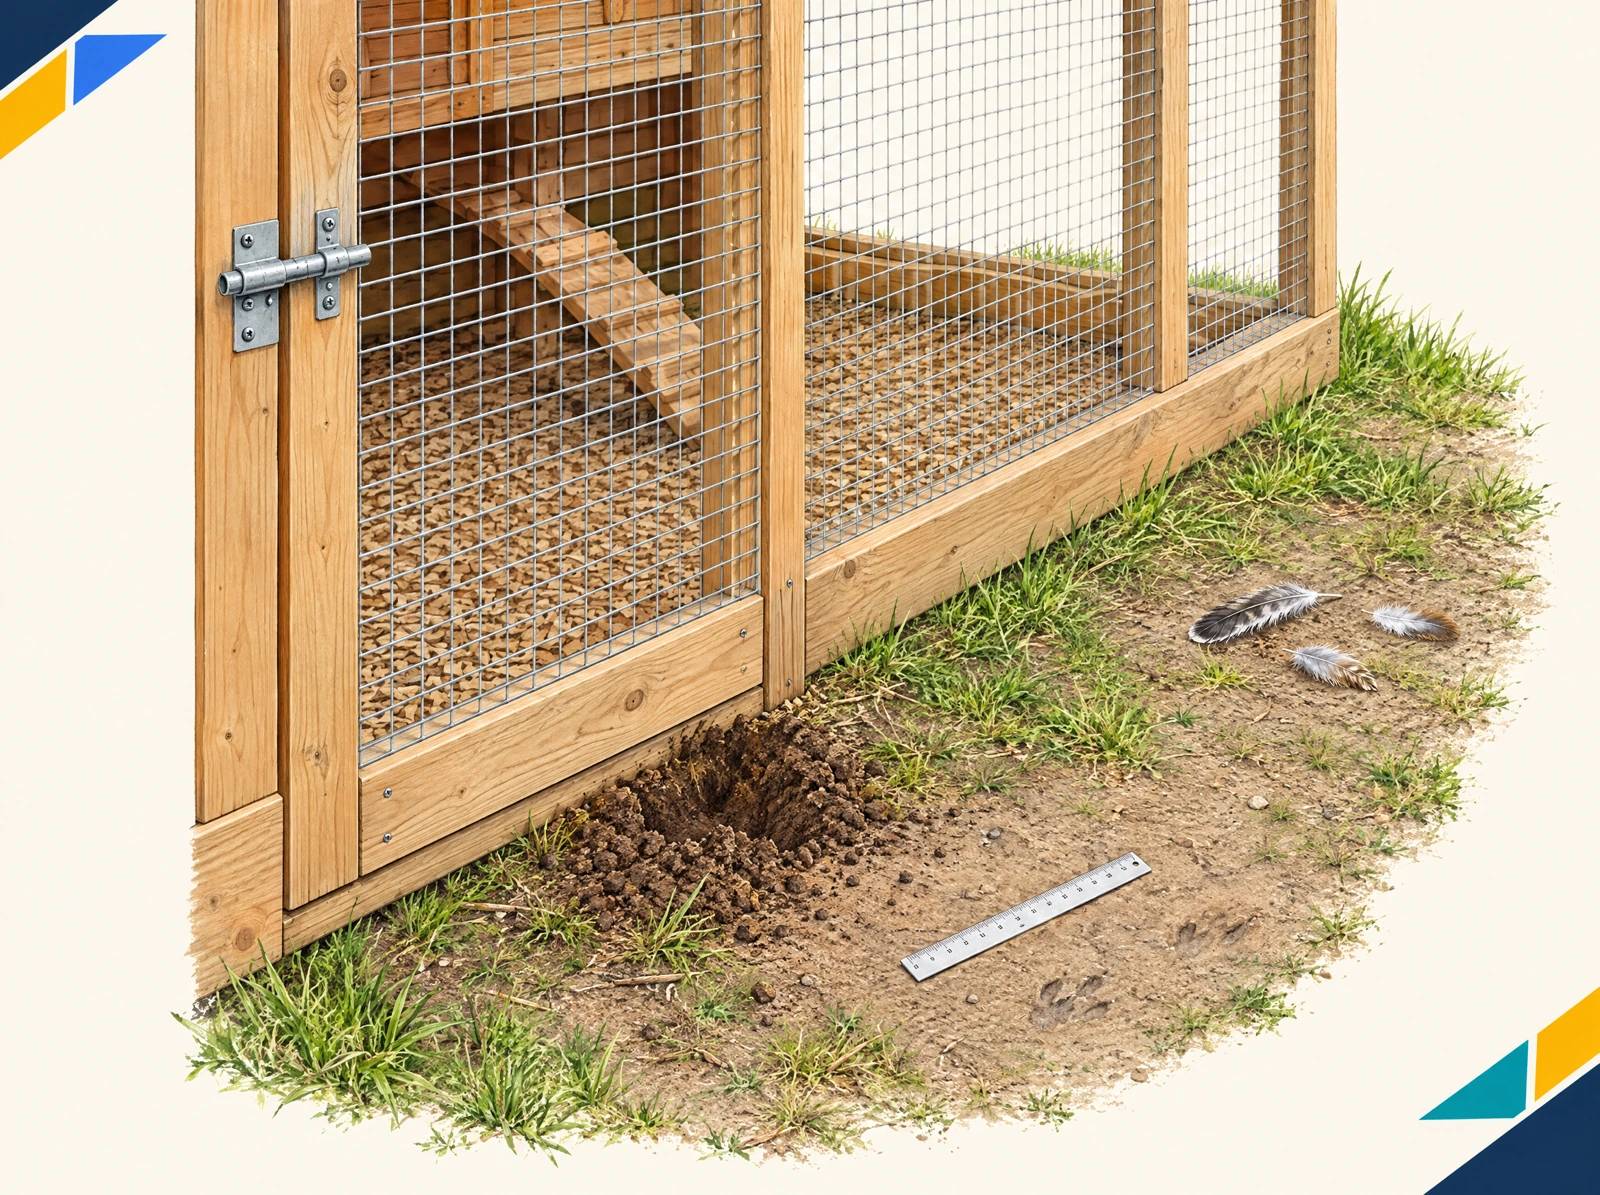
THE VISUAL KEY
Select a number to match the picture and key.
A useful evidence photograph
Include the print and its size.
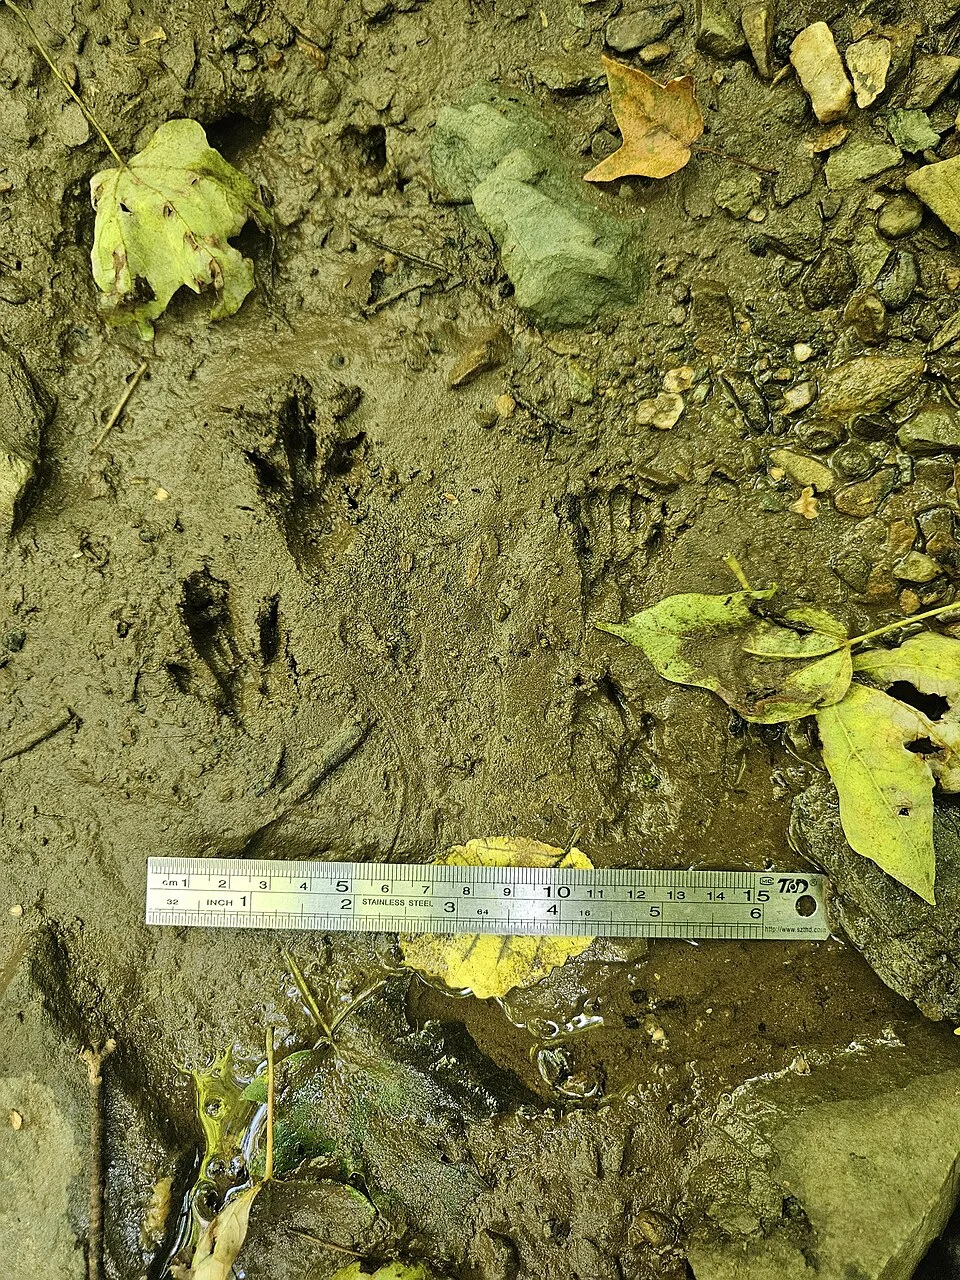
Raccoon tracks with a ruler
1 · An impression with long toe marks. 2 · A ruler beside the prints preserves their scale.
Photo: Alex Abair · CC BY 4.0 · resized; reference labels added separately.
One close-up.
One wider view.
- Photograph a clear print straight down, with a ruler beside it.
- Take a wider photo showing the track trail and nearby entry point.
- Record toe count, visible claws, print dimensions and when you found it.
Soft ground changes print shape; an incomplete print can mislead.
Open the illustrated mammal track key (PDF)FIELD NOTE 06 / Chick development
Watch the feathers change.
Compare feather coverage rather than guessing age from size alone. These illustrations explain the stages; the photographs show individual birds.
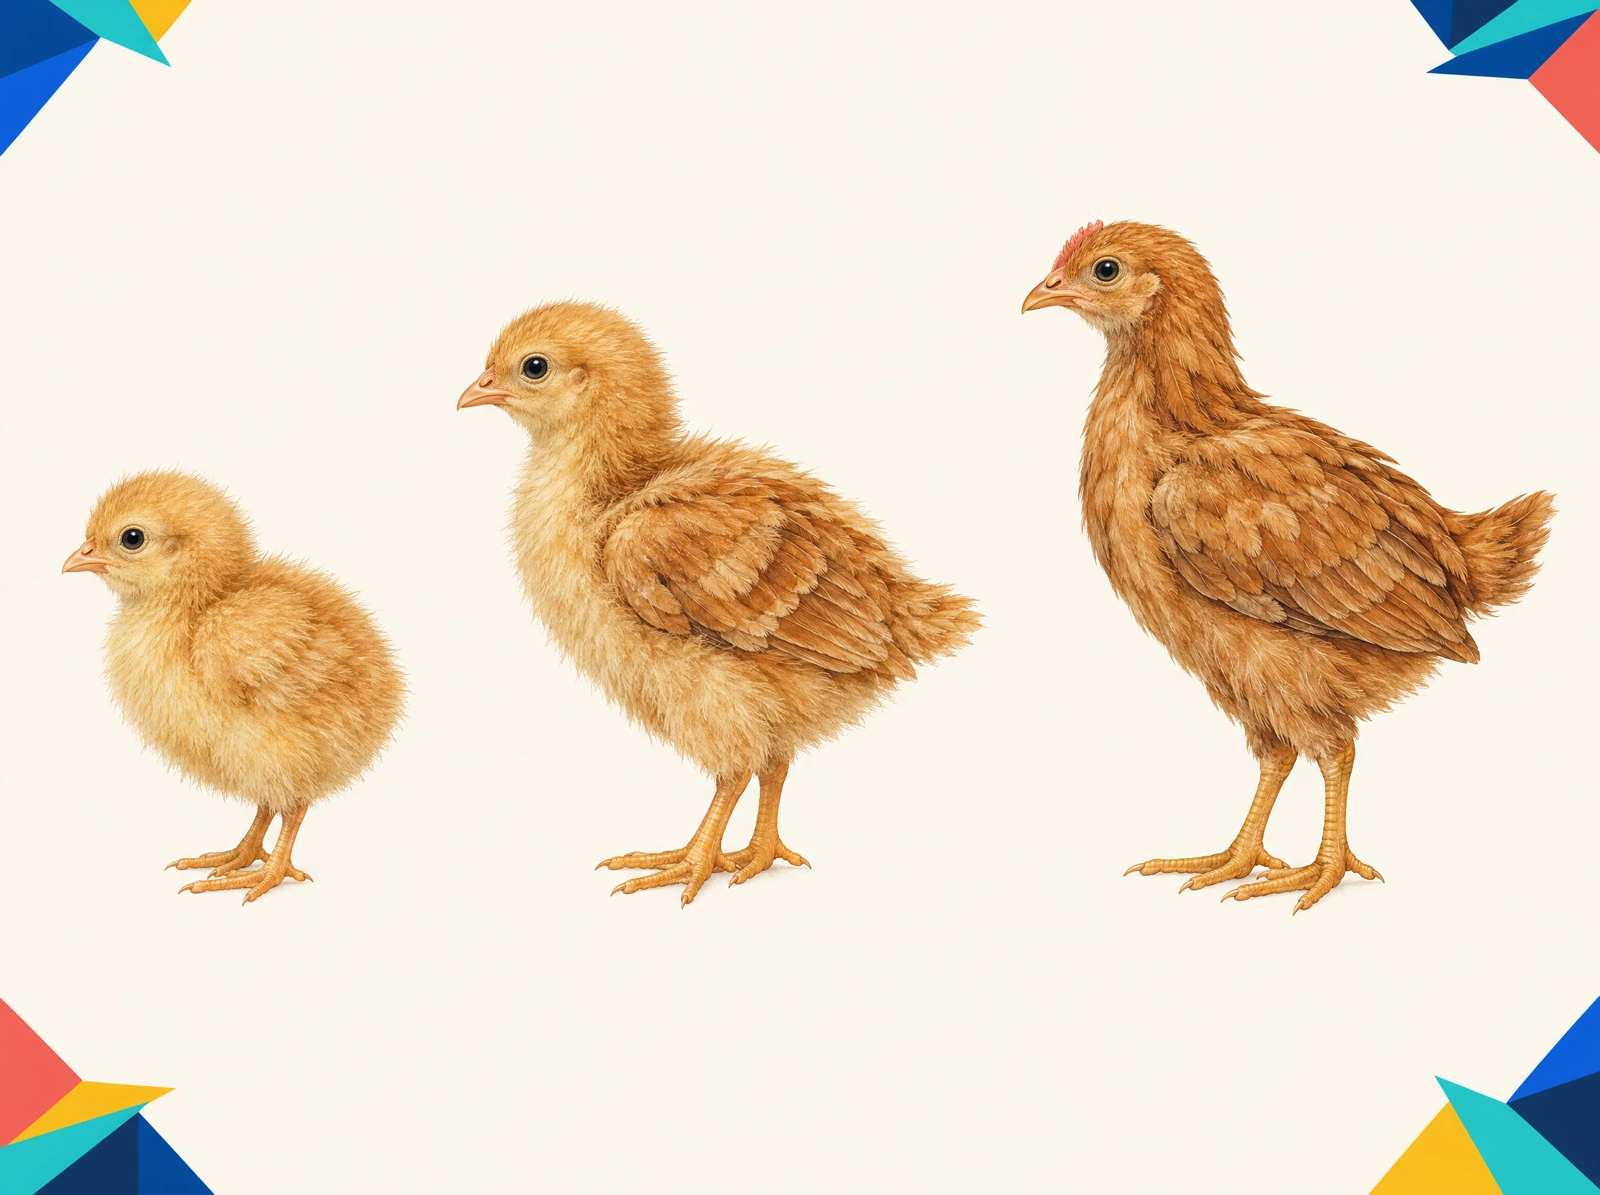
THE VISUAL KEY
Select a number to match the picture and key.
A real juvenile for comparison
Down and feathers can share the same bird.
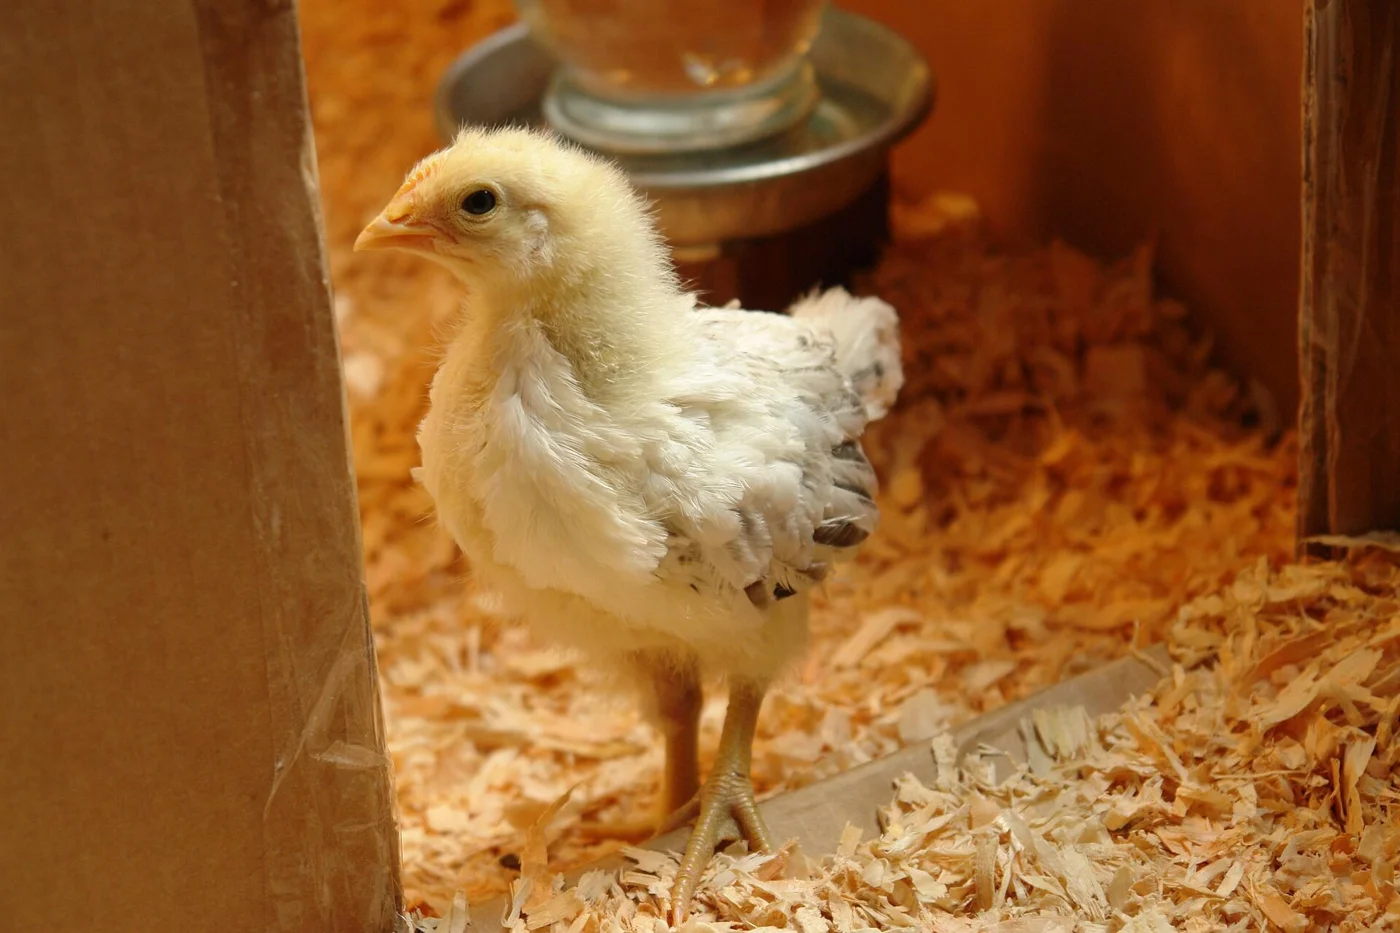
A photographed three-week-old Delaware chick
1 · Fluffy down remains on the head. 2 · More defined feathers cover the wing. The age is the photographer’s record of this bird, not a universal timetable.
Photo: Josh Larios from Seattle, US · CC BY-SA 2.0 · resized; reference labels added separately.
Keep a simple
growth photo diary.
Photograph the same chick from the side each week. Keep the lighting and distance similar, and record the hatch date separately.
Watch feather coverage and behavior alongside your brooder plan. Size or one wing photo cannot establish exact age or outdoor readiness.
Open the keeper toolkit →